Estás aquí. : Casa / Noticias / Pasos para el montaje del molino de rodillos de alta presión y la instalación de la camisa del rodillo
2023-08-05

Pasos para el montaje del molino de rodillos de alta presión y la instalación de la camisa del rodillo

Como equipo de trituración a gran escala, el molino de rodillos de alta presión generalmente se instala en el sitio después de que los componentes se ensamblan en el taller. El rodillo, como principal componente triturador del molino de rodillos de alta presión, tiene requisitos más estrictos en términos de montaje e instalación. , Los siguientes fabricantes de máquinas briquetadoras han clasificado los pasos de instalación de los rodillos y las camisas de los rodillos del molino de rodillos de alta presión para su referencia.

Montaje de rodillos de molino de rodillos de alta presión.

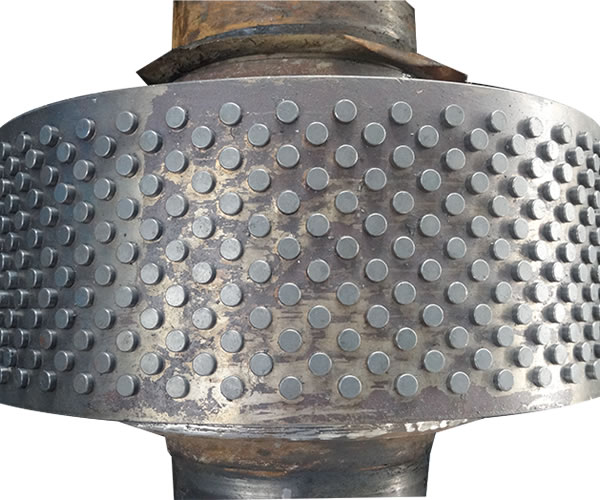
El montaje e instalación de los rodillos del molino de rodillos de alta presión se dividen principalmente en dos etapas. La primera es instalar la funda del rodillo en el núcleo del rodillo en el taller. Normalmente, el quemador está caliente. Después de instalar en caliente la funda del rodillo, se instala después del enfriamiento natural. Aspectos; la segunda etapa es el transporte general de los rodillos y la instalación de los rodillos en el equipo.
As a large-scale crushing equipment, the high-pressure roller mill is usually installed on site after the components are assembled in the workshop. The roller, as the main crushing component of the high-pressure roller mill, has stricter requirements in terms of assembly and installation. , The following briquetting machine manufacturers have sorted out the installation steps of the high-pressure roller mill rollers and roller sleeves for your reference. Assembly of high pressure roller mill rollers The assembly and installation of the high-pressure roller mill rollers are mainly divided into two stages. The first is to install the roller sleeve on the roller core in the workshop. Usually, the burner is hot-loaded. After the roller sleeve is hot-installed, it is installed after natural cooling. Bearings; the second stage is the overall transport of the rollers and the installation of the rollers on the equipment. high-pressure roller mill 1. Roller sleeve installation steps (1) Before assembling, measure the inner diameter of the roller sleeve and the outer diameter of the roller core. The inner diameter of the roller sleeve is checked with an inner diameter micrometer. The graduation value is 0.002mm. The outer diameter micrometer suitable for this roller core is 1000mm~ 1500mm, the division value is 0.01mm, the division value is too large, the equipment comes with a special tool for measuring the roll core, the measurement is divided into three parts: upper, middle and lower, and each part is divided into three points A, B, and C. The average value of the measured data is taken. The inner diameter of the roll sleeve is smaller than the outer diameter of the roll core by 0.2mm~0.5mm. (2) Use kerosene to clean the anti-rust oil on the roller core, there should be no burrs on the roller core, then erect the roller core on the erected bracket, adjust the verticality of the roller core with a level ruler, and wipe a small amount of lubricating oil. (3) Assemble the roller sleeve after the adjustment of the roller core. Before hoisting, wipe the heating interior with acetone, hoist it away from 10cm, adjust the levelness of the roller sleeve with a spirit level, and quickly set it on the roller core after the adjustment is qualified. (4) The lower part of the roller sleeve is supported by four screw jacks. By adjusting the four screw jacks, the upper and lower distances between the roller sleeve and the roller core are adjusted and measured with a depth micrometer. It is required that the upper and lower distance error should not be greater than 0.02mm. (5) Use the air compressor to quickly cool the edge of the roll sleeve, and then shrink the inner hole of the roll sleeve to achieve positioning with the roll core, and then cool naturally. Bearing installation (1) After the roller is cooled, put the roller down and adjust the levelness of the roll neck with a level ruler, and the levelness shall not be greater than 0.2mm; (2) Use kerosene to clean the part where the bearing is installed on the roll neck and all parts of the bearing, check whether there is burr on the installation part of the roll neck, and apply lubricating oil on the roll neck after the treatment is qualified; (3) Install the dustproof sealing ring according to the position on the drawing; (4) Use the hydraulic nut to install the bearing. There are steel marks on each part of the bearing. Carefully check the marks during installation to ensure the correct installation direction. Transportation and installation of high pressure roller mill rollers high-pressure roller mill 1. Transportation of rollers When the bearing box is installed, the roller is transported. In order to prevent the bearing on the roller from being partially stressed and damage the bearing, according to the size of the bearing seat, use the bolt hole of the bearing seat to process a special hoisting beam, so that the two rollers can be installed. The bearing seat is connected into a hybrid, so that the bearing seat is subjected to vertical force. 2. Overall installation of rollers Before the rollers are transported to the site, open the legs of the high-pressure roller mill frame. There are bolts under the legs. Use a frame level to adjust the level of the legs through the bolts. The level deviation should not be greater than 0.02mm. Apply grease to the outrigger rails and rack rails, hoist the rollers to the rack outriggers, remove the hoisting beams, move the rollers in, and the installation is complete. The above is all about the assembly and installation of the high pressure roller mill rollers, I hope it can be helpful to you. The high-pressure roller mill produced by our company is equipped with a sealed roller cover while ensuring lower energy consumption, which can strictly control the diffusion of dust.

1. Pasos de instalación de la funda del rodillo

(1) Antes del montaje, mida el diámetro interior de la manga del rodillo y el diámetro exterior del núcleo del rodillo. El diámetro interior del manguito del rodillo se comprueba con un micrómetro de diámetro interior. El valor de graduación es de 0,002 mm. El micrómetro de diámetro exterior adecuado para este núcleo de rodillo es de 1000 mm ~ 1500 mm, el valor de división es 0,01 mm, el valor de división es demasiado grande, el equipo viene con una herramienta especial para medir el núcleo del rodillo, la medida se divide en tres partes: superior , medio e inferior, y cada parte se divide en tres puntos A, B y C. Se toma el valor promedio de los datos medidos. El diámetro interior de la manga del rollo es menor que el diámetro exterior del núcleo del rollo entre 0,2 mm y 0,5 mm.

(2) Utilice queroseno para limpiar el aceite antioxidante en el núcleo del rodillo, no debe haber rebabas en el núcleo del rodillo, luego levante el núcleo del rodillo sobre el soporte levantado, ajuste la verticalidad del núcleo del rodillo con una regla niveladora y limpie una pequeña cantidad de aceite lubricante.

(3) Ensamble la funda del rodillo después de ajustar el núcleo del rodillo. Antes de izar, limpie el interior de la calefacción con acetona, levántelo a una distancia de 10 cm, ajuste la nivelación de la manga del rodillo con un nivel de burbuja y colóquelo rápidamente en el núcleo del rodillo después de que se califique el ajuste.

(4) La parte inferior del manguito del rodillo está sostenida por cuatro gatos de tornillo. Ajustando los cuatro elevadores de husillo se ajustan y miden con un micrómetro de profundidad las distancias superior e inferior entre el manguito del rodillo y el núcleo del rodillo. Se requiere que el error de distancia superior e inferior no sea superior a 0,02 mm.

(5) Utilice el compresor de aire para enfriar rápidamente el borde de la funda del rollo y luego encoja el orificio interior de la funda del rollo para lograr el posicionamiento con el núcleo del rollo y luego enfríe de forma natural.


Instalación de rodamientos

(1) Después de que se enfríe el rodillo, colóquelo y ajuste la nivelación del cuello del rollo con una regla de nivel, y la nivelación no deberá ser superior a 0,2 mm;

(2) Use queroseno para limpiar la parte donde está instalado el rodamiento en el cuello del rodillo y todas las partes del rodamiento, verifique si hay rebabas en la parte de instalación del cuello del rodillo y aplique aceite lubricante en el cuello del rodillo después del tratamiento. está calificado;

(3) Instale el anillo de sellado a prueba de polvo según la posición en el dibujo;

(4) Utilice la tuerca hidráulica para instalar el rodamiento. Hay marcas de acero en cada parte del rodamiento. Verifique cuidadosamente las marcas durante la instalación para garantizar la dirección de instalación correcta.

Transporte e instalación de rodillos de molino de rodillos de alta presión.

As a large-scale crushing equipment, the high-pressure roller mill is usually installed on site after the components are assembled in the workshop. The roller, as the main crushing component of the high-pressure roller mill, has stricter requirements in terms of assembly and installation. , The following briquetting machine manufacturers have sorted out the installation steps of the high-pressure roller mill rollers and roller sleeves for your reference. Assembly of high pressure roller mill rollers The assembly and installation of the high-pressure roller mill rollers are mainly divided into two stages. The first is to install the roller sleeve on the roller core in the workshop. Usually, the burner is hot-loaded. After the roller sleeve is hot-installed, it is installed after natural cooling. Bearings; the second stage is the overall transport of the rollers and the installation of the rollers on the equipment. high-pressure roller mill 1. Roller sleeve installation steps (1) Before assembling, measure the inner diameter of the roller sleeve and the outer diameter of the roller core. The inner diameter of the roller sleeve is checked with an inner diameter micrometer. The graduation value is 0.002mm. The outer diameter micrometer suitable for this roller core is 1000mm~ 1500mm, the division value is 0.01mm, the division value is too large, the equipment comes with a special tool for measuring the roll core, the measurement is divided into three parts: upper, middle and lower, and each part is divided into three points A, B, and C. The average value of the measured data is taken. The inner diameter of the roll sleeve is smaller than the outer diameter of the roll core by 0.2mm~0.5mm. (2) Use kerosene to clean the anti-rust oil on the roller core, there should be no burrs on the roller core, then erect the roller core on the erected bracket, adjust the verticality of the roller core with a level ruler, and wipe a small amount of lubricating oil. (3) Assemble the roller sleeve after the adjustment of the roller core. Before hoisting, wipe the heating interior with acetone, hoist it away from 10cm, adjust the levelness of the roller sleeve with a spirit level, and quickly set it on the roller core after the adjustment is qualified. (4) The lower part of the roller sleeve is supported by four screw jacks. By adjusting the four screw jacks, the upper and lower distances between the roller sleeve and the roller core are adjusted and measured with a depth micrometer. It is required that the upper and lower distance error should not be greater than 0.02mm. (5) Use the air compressor to quickly cool the edge of the roll sleeve, and then shrink the inner hole of the roll sleeve to achieve positioning with the roll core, and then cool naturally. Bearing installation (1) After the roller is cooled, put the roller down and adjust the levelness of the roll neck with a level ruler, and the levelness shall not be greater than 0.2mm; (2) Use kerosene to clean the part where the bearing is installed on the roll neck and all parts of the bearing, check whether there is burr on the installation part of the roll neck, and apply lubricating oil on the roll neck after the treatment is qualified; (3) Install the dustproof sealing ring according to the position on the drawing; (4) Use the hydraulic nut to install the bearing. There are steel marks on each part of the bearing. Carefully check the marks during installation to ensure the correct installation direction. Transportation and installation of high pressure roller mill rollers high-pressure roller mill 1. Transportation of rollers When the bearing box is installed, the roller is transported. In order to prevent the bearing on the roller from being partially stressed and damage the bearing, according to the size of the bearing seat, use the bolt hole of the bearing seat to process a special hoisting beam, so that the two rollers can be installed. The bearing seat is connected into a hybrid, so that the bearing seat is subjected to vertical force. 2. Overall installation of rollers Before the rollers are transported to the site, open the legs of the high-pressure roller mill frame. There are bolts under the legs. Use a frame level to adjust the level of the legs through the bolts. The level deviation should not be greater than 0.02mm. Apply grease to the outrigger rails and rack rails, hoist the rollers to the rack outriggers, remove the hoisting beams, move the rollers in, and the installation is complete. The above is all about the assembly and installation of the high pressure roller mill rollers, I hope it can be helpful to you. The high-pressure roller mill produced by our company is equipped with a sealed roller cover while ensuring lower energy consumption, which can strictly control the diffusion of dust.

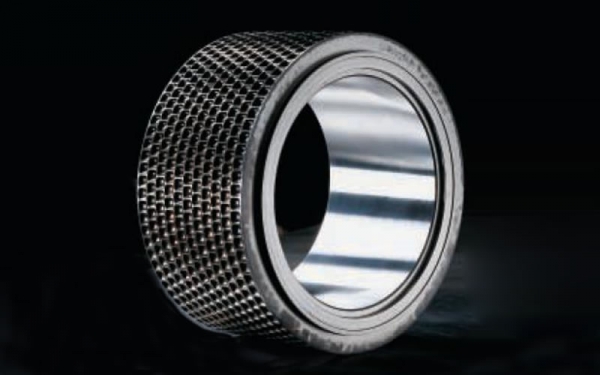
1. Transporte de rodillos

Cuando se instala la caja de rodamientos, se transporta el rodillo. Para evitar que el rodamiento del rodillo se esfuerce parcialmente y dañe el rodamiento, de acuerdo con el tamaño del asiento del rodamiento, use el orificio del perno del asiento del rodamiento para procesar una viga de elevación especial, de modo que se puedan instalar los dos rodillos. . El asiento del cojinete está conectado formando un híbrido, de modo que el asiento del cojinete está sometido a una fuerza vertical.

2. Instalación general de rodillos.

Antes de transportar los rodillos al sitio, abra las patas del marco del molino de rodillos de alta presión. Hay tornillos debajo de las piernas. Utilice un nivel de marco para ajustar el nivel de las patas a través de los pernos. La desviación de nivel no debe ser superior a 0,02 mm. Aplique grasa a los rieles de los estabilizadores y a los rieles del bastidor, levante los rodillos a los estabilizadores del bastidor, retire las vigas de elevación, mueva los rodillos hacia adentro y la instalación estará completa.

Lo anterior tiene que ver con el montaje e instalación de los rodillos del molino de rodillos de alta presión, espero que pueda serle útil. El molino de rodillos de alta presión producido por nuestra empresa está equipado con una cubierta de rodillos sellada que garantiza un menor consumo de energía, lo que puede controlar estrictamente la difusión del polvo.


Compartir este artículo

Obtener una oferta

Agente oficial de zy Mining en Rusia.

Introduzca aquí.

Datos de contacto:

Add: Zona industrial de Luoxin, ciudad de Luoyang, provincia de Henan, República Popular China

Tel: +86-379-67313306

E-mail: gloria@zyksjx.com

Copyright © All Rights Reserved Minería ZY Sitexml Powered by www.sxglpx.com